
This time, I’m sharing professional tips for capturing the starry sky. With these tips, you’ll take your night sky photography to the next level – you can even start with your phone’s camera!

First of all, you’ll get the best star photos far from city lights. When conditions are just right, the stunning views of the night sky will tempt you to grab your camera. However, astrophotography requires a bit more technical knowledge than daytime photography. As a professional photographer, I’m often asked: what settings should you use on your camera and how do you find the best composition for starry sky photos? No worries! With the tips in this blog, you’ll succeed in capturing a beautiful starry sky. It’s easy to get hooked on astrophotography!
In astrophotography, location and conditions are key to success.
The astrophotography season starts in mid-August when the nights get darker. The nights of autumn and early winter are especially good for star photography: it gets deeply dark, but the night frost is usually not too bothersome yet. The season continues until spring.
A couple of hours after sunset, it’s dark enough to start capturing dreamlike star photos. Often, you can find beautiful lakesides, national parks, ponds, or lakes outside the cities to head to.
You can check light pollution areas from various services, like this light pollution map. Additionally, you need to monitor the cloud situation: you can’t get star photos on a cloudy night, for this I use an app called Windy.
During a full moon, the moonlight is too bright, and you can’t capture the starry sky. So, it’s worth keeping track of moonrise and moonset times and moon phases. I also recommend taking moon photos! I follow moon events with the Lumos app.
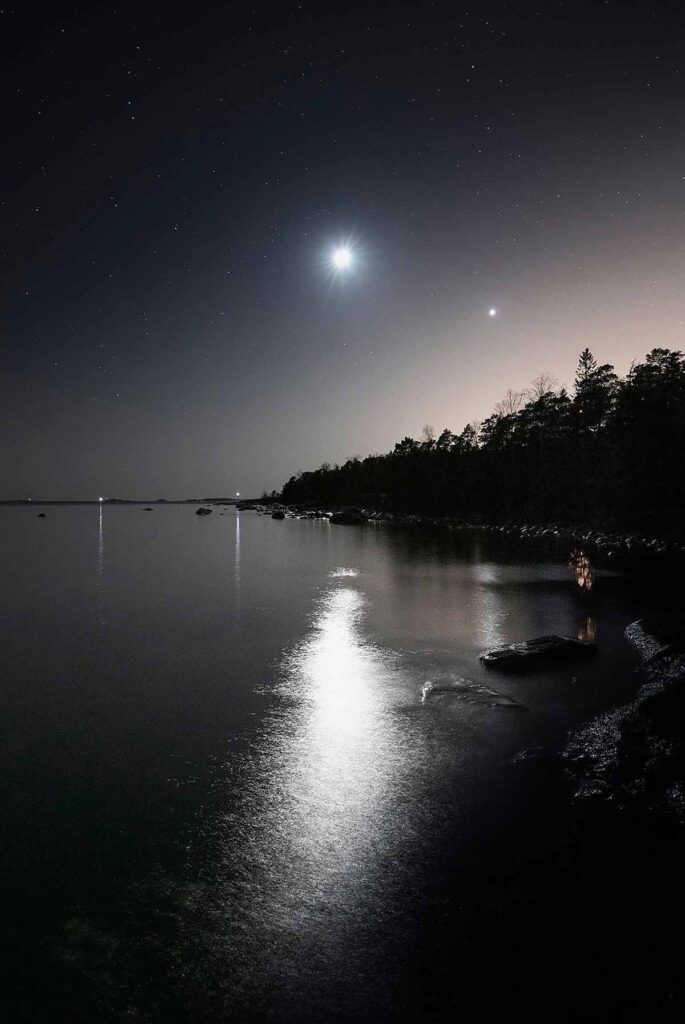
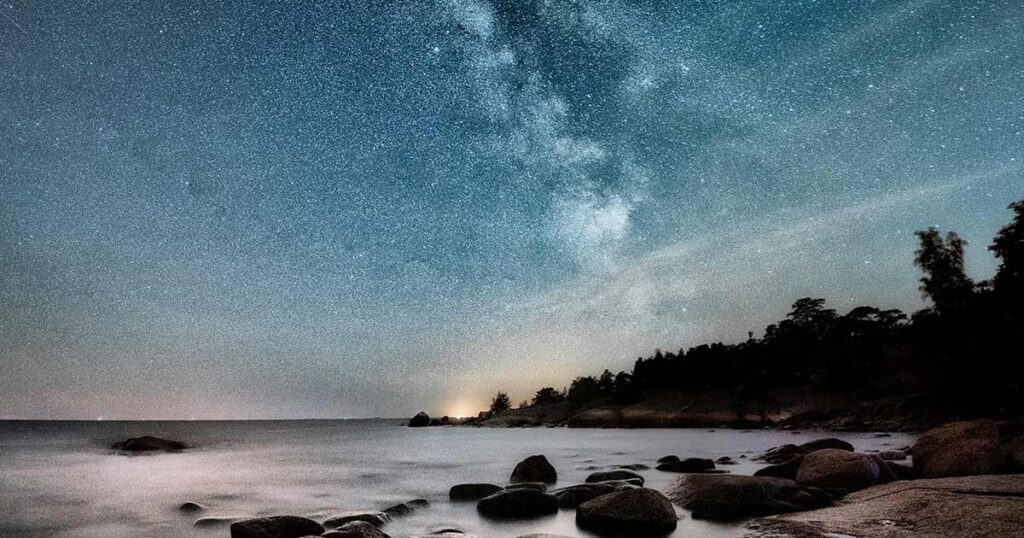
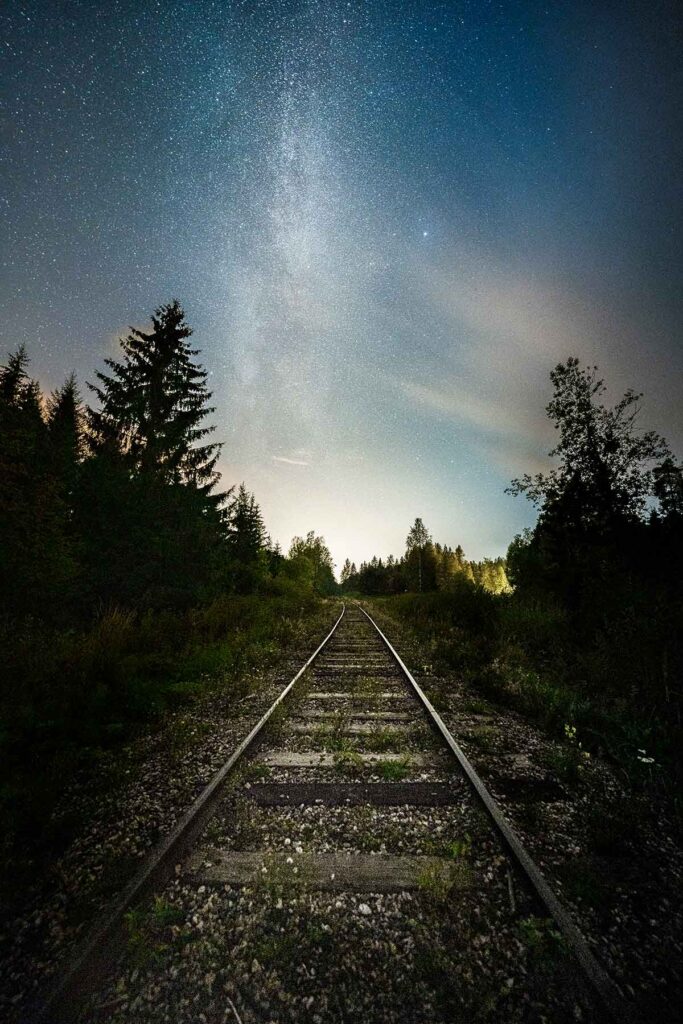
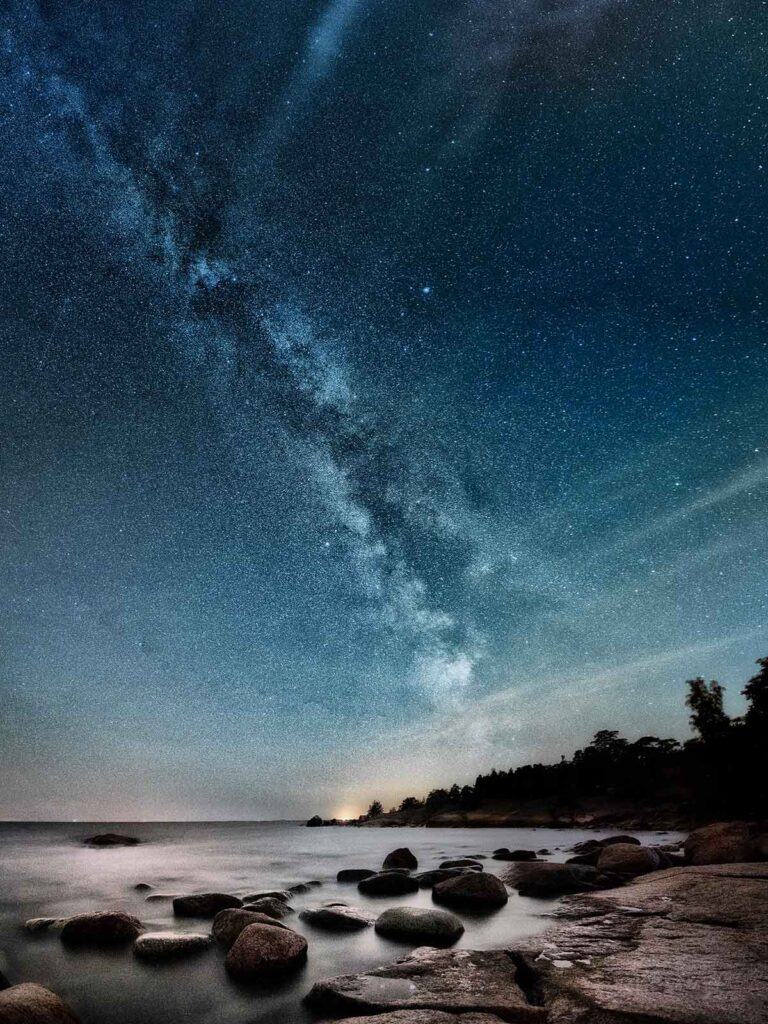
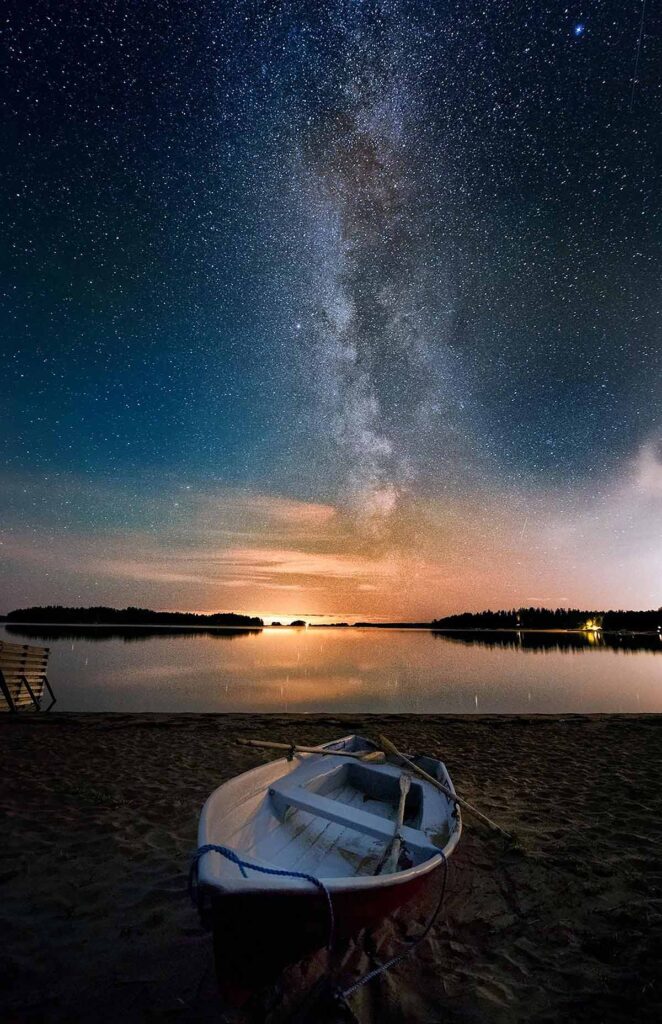
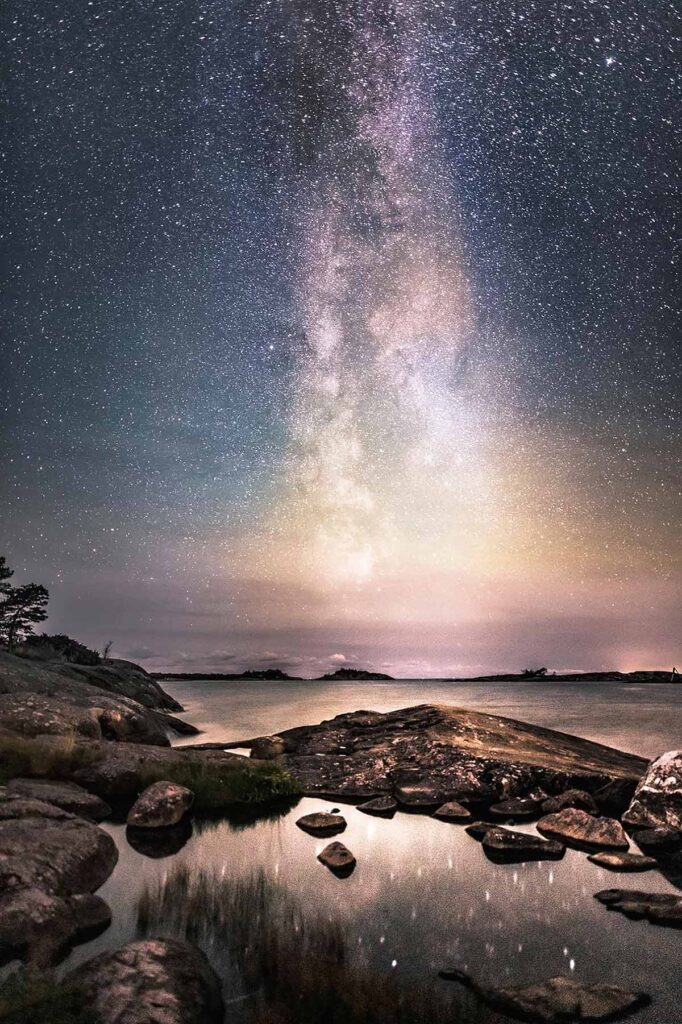
Choose a location that’s as open as possible so you can see the sky well. For example, a lake is a good location because, on a calm night, the stars reflect beautifully off the lake’s surface. If you want to capture an amazing photo for social media, I recommend choosing an angle that includes something in the foreground, like a tree or rock. In my opinion, a successful star photo combines an element from the ground with the Milky Way. I often shoot vertically to fit more of the sky in the picture. I often shoot vertically to fit more of the sky in the picture.
My favorite spots in Southern Finland are Varlaxudden in Emäsalo, Porvoo, and Porkkalanniemi in Kirkkonummi. I highly recommend visiting these places if they happen to be on your route.
Tips for Beginners to Capture the Starry Sky
Night photography isn’t easy for first-timers, and it involves some challenges compared to daytime shooting. Handheld shots won’t work, and a photo trip requires some planning. More time is needed to get a successful photo compared to daytime, and night photography requires different equipment than daytime photography. Fortunately, all this effort is rewarded many times over when you succeed in capturing the starry sky.
Here are my precise tips for capturing the starry sky with a DSLR:
- Your camera should have enough ISO sensitivity, and it’s best to choose RAW as the recording format so you can better adjust the camera settings afterward.
- You’ll need a tripod and the self-timer function that comes standard on every camera to get a good photo. This minimizes the risk of camera shake.
- Pair your DSLR with a wide-angle lens. Night scenes require a lens with a large aperture, which you can identify by a small f-number. A suitable f-number could be f2.8; if your lens is something like f4–5.6, it’s not best suited for star photography. I use lenses with a focal length of 12–24 mm, and my favorite is a fixed 14 mm f1.8 lens. I use lenses with a focal length of 12–24 mm, and my favorite is a fixed 14 mm f1.8 lens.
- Focusing should be done manually. I usually focus on the farthest stars through the camera’s screen.
- Choose a long exposure time (15–25 seconds) so the stars don’t move in the picture.
- Set the white balance appropriately. After taking the photo, check the result immediately on the camera: if the picture is too dark or too bright, you can adjust, for example, the exposure time or ISO sensitivity.
Quick Tips for Capturing the Starry Sky with Your Phone:
Fortunately for beginners, you can even succeed with your phone’s camera, and your equipment doesn’t have to be top-of-the-line! Still, your phone should be one of the newer models to take star photos: you should be able to adjust the exposure to around 10 seconds. Get a tripod for your phone. This makes shooting much easier. When photographing with a phone, the natural lighting is helpful. Utilize the moonlight in your pictures.
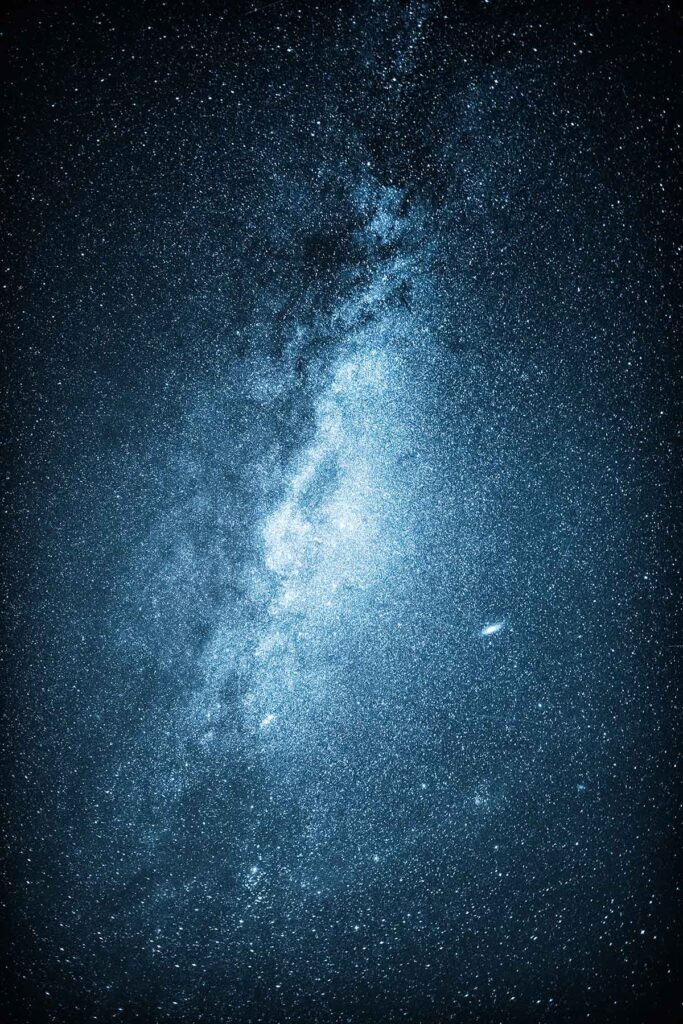
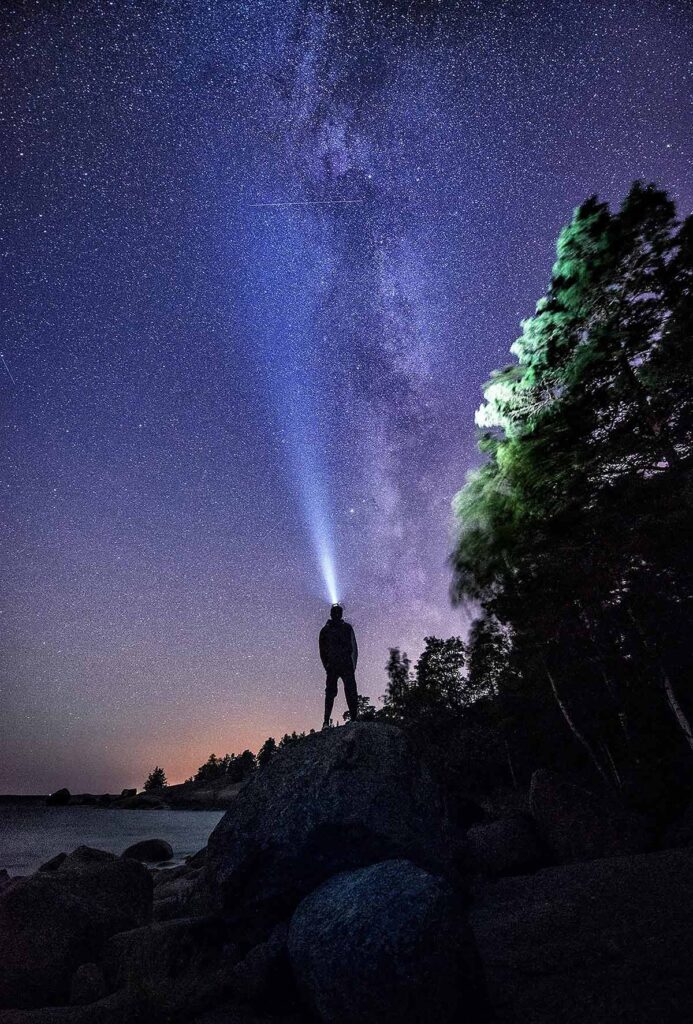
Capturing the Milky Way in Starry Sky Photos
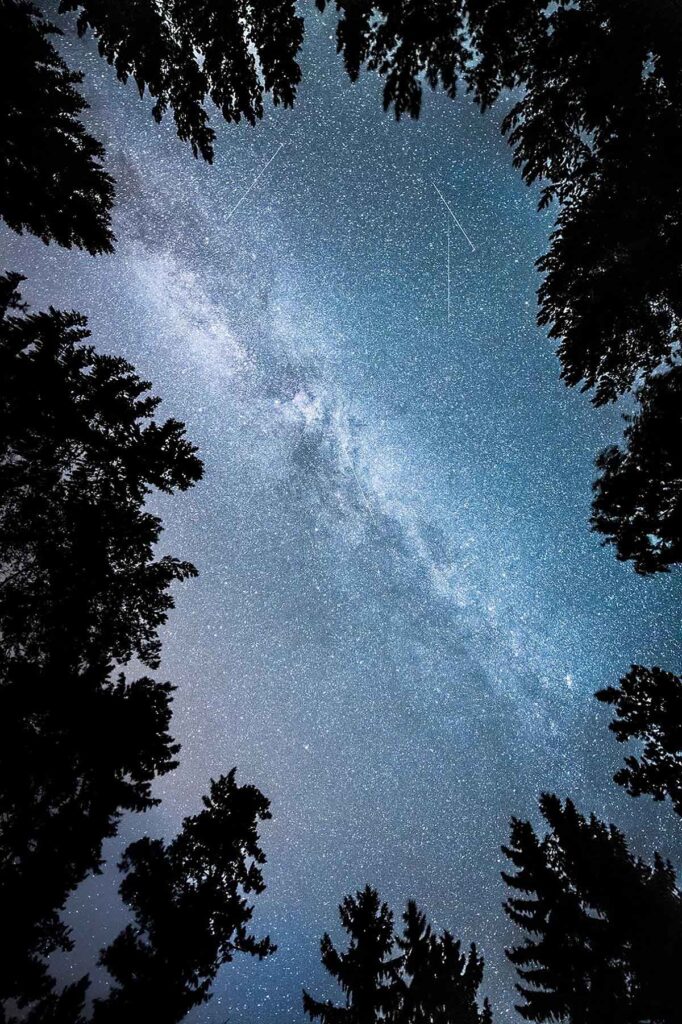
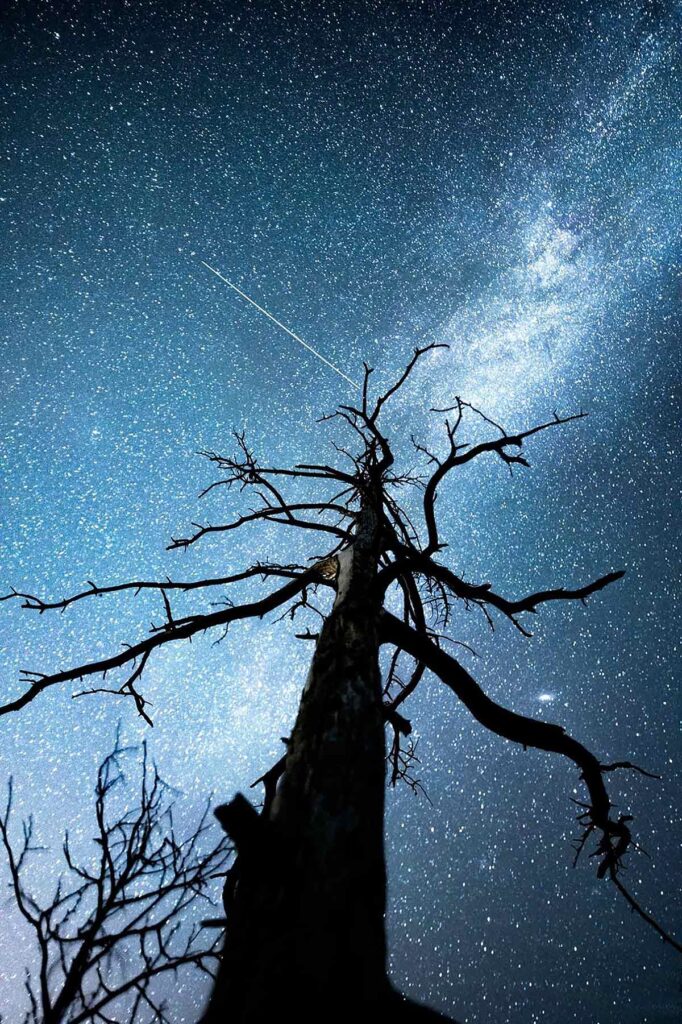
The Milky Way is the galaxy where Earth and our entire Solar System are located. The faint Milky Way arcs beautifully across the night sky in the southern sky. When you reach a place dark enough that light pollution doesn’t obscure the sky, you can see the Milky Way almost immediately.
In Southern Finland, the Milky Way is visible in many nearby areas out of reach of city light pollution, but surprisingly many people haven’t gone to admire it. You can see the Milky Way with the naked eye – you don’t necessarily need a camera to enjoy this sight.
Besides the Milky Way, in autumn, you can spot various constellations, such as Cygnus and Cassiopeia at the southern end of the Milky Way. As the Earth rotates on its axis and orbits the Sun, the Milky Way is constantly moving. This sometimes requires a bit of waiting to get the Milky Way into the desired position for your photo.
I usually shoot stars for about 2–3 hours at a time. In that time, you’ll get a few successful star photos that you can publish. If you’re lucky, you might also see the northern lights or the moon rising or setting on the same trip. You can get amazing photos of them too.
Remember at least these essentials when you go to photograph the starry sky:
- Some kind of light is good to have so you can move around and see the camera buttons in the dark. The best option is a headlamp: this way, your hands are free to adjust the camera settings. If your headlamp has a red light, it’s often a good choice so you don’t “blind” your eyes while photographing stars.
- Pack spare batteries for your camera and headlamp.
- Be prepared with warm clothing, good and sturdy shoes, and gloves: autumn nights can get freezing.
- If the weather requires it, bring a cleaning cloth to wipe moisture off the camera.